
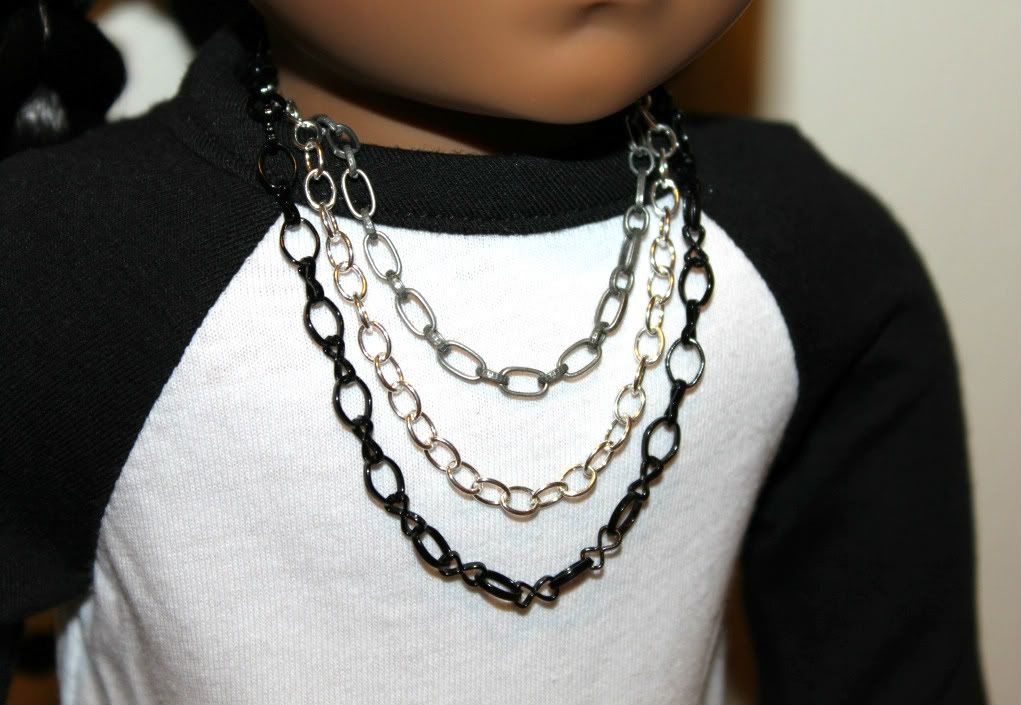
Our project today is creating three "cascade" necklaces for Kaya. We didn't really know what else to call them, but we figure "cascade" is clear enough -- maybe "tiered" would work as well. Essentially what we did is connect three chains of varying length to one magnetic closure.
Warning: Long post. Lots of pictures!
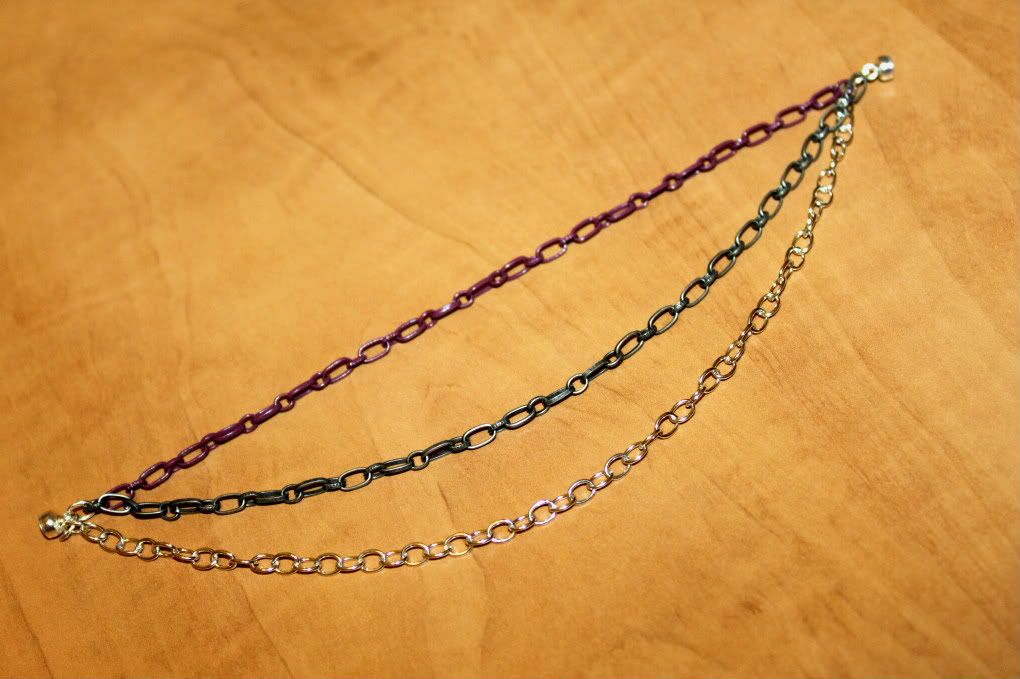
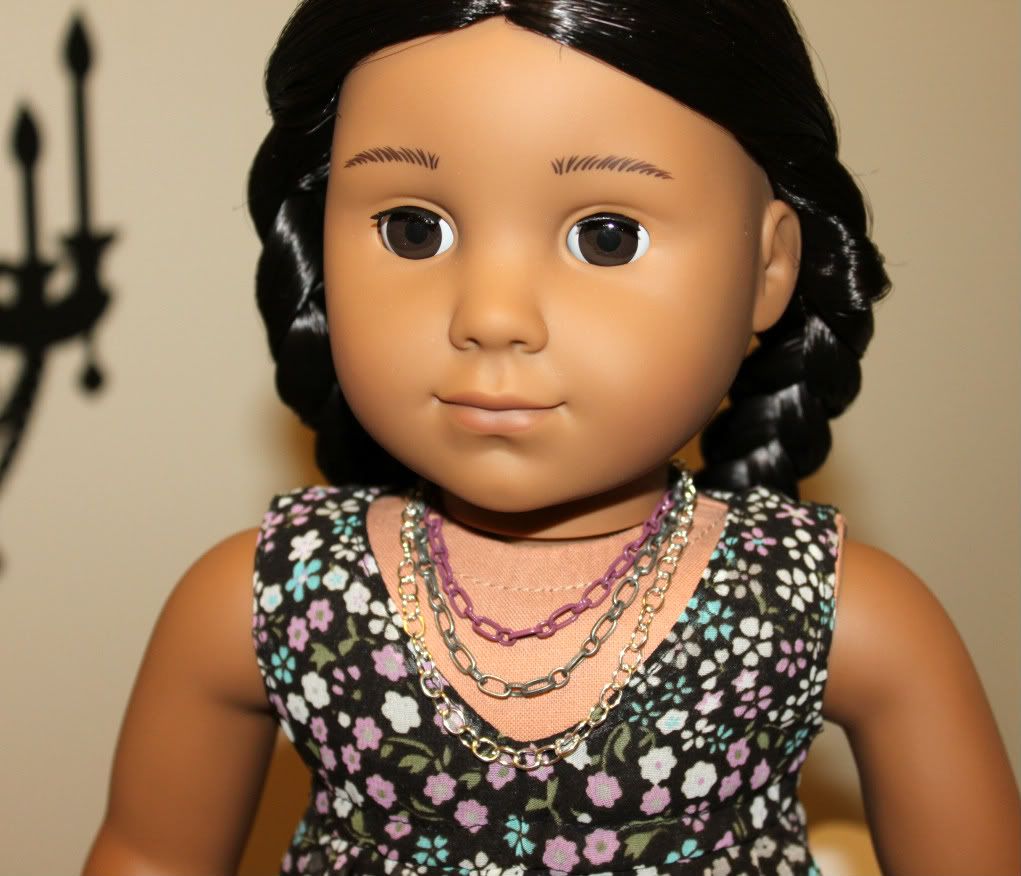
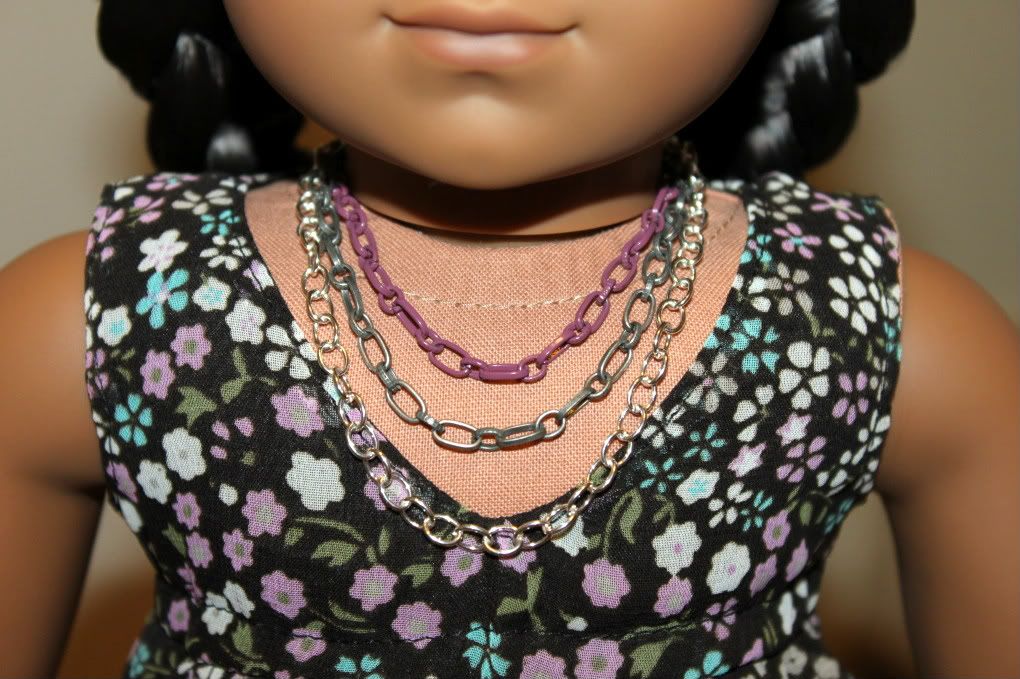
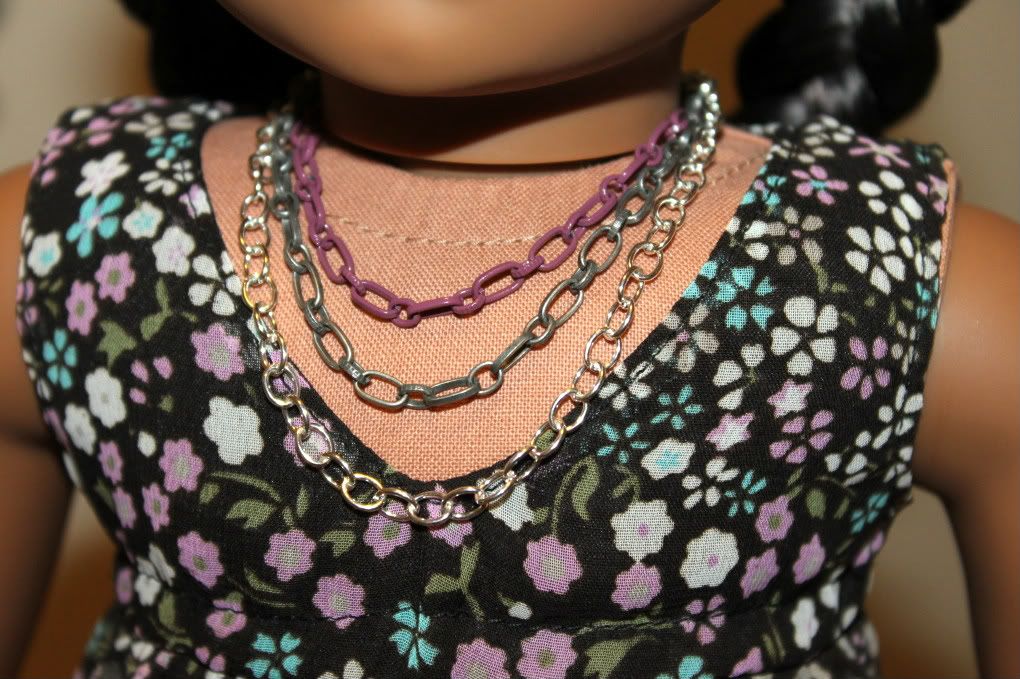
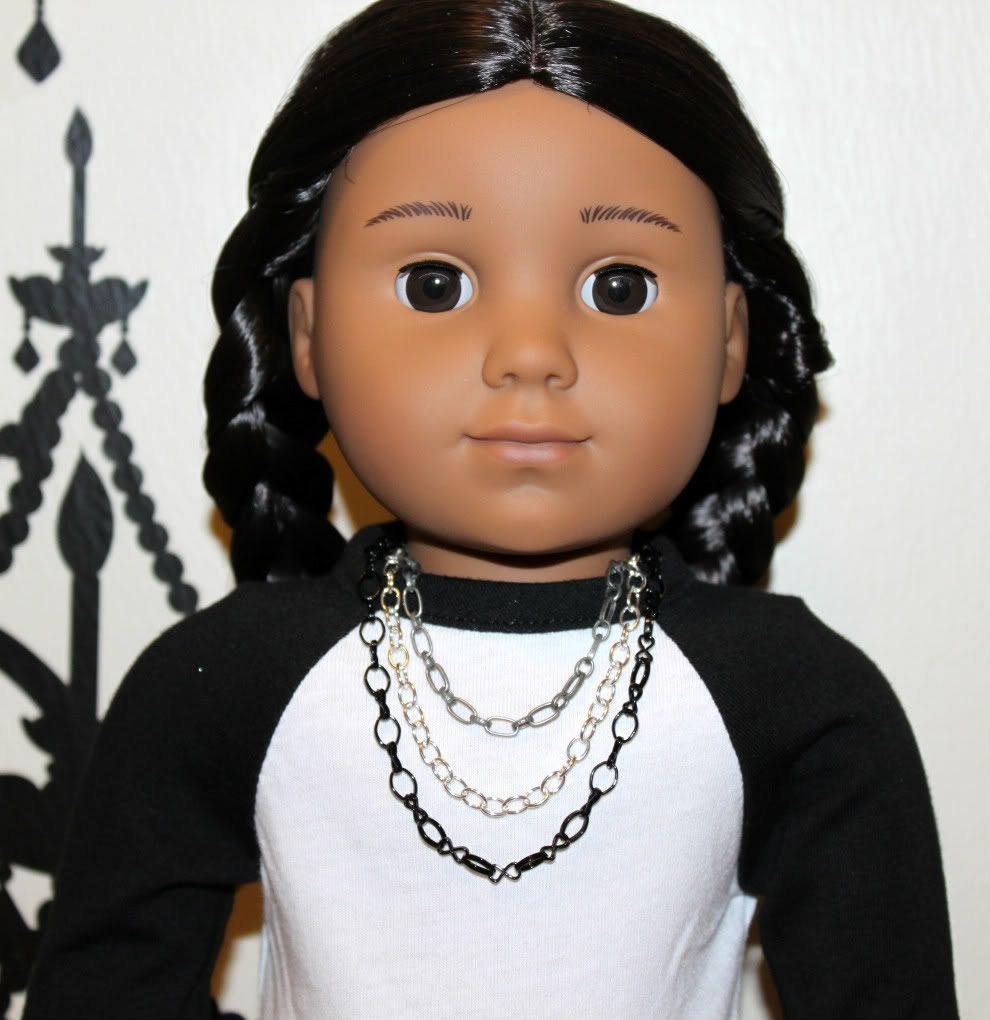
For our first experiment with this technique we used purple, dark grey, and shiny silver chain lengths -- you can see the necklace on our stand in the pics below...
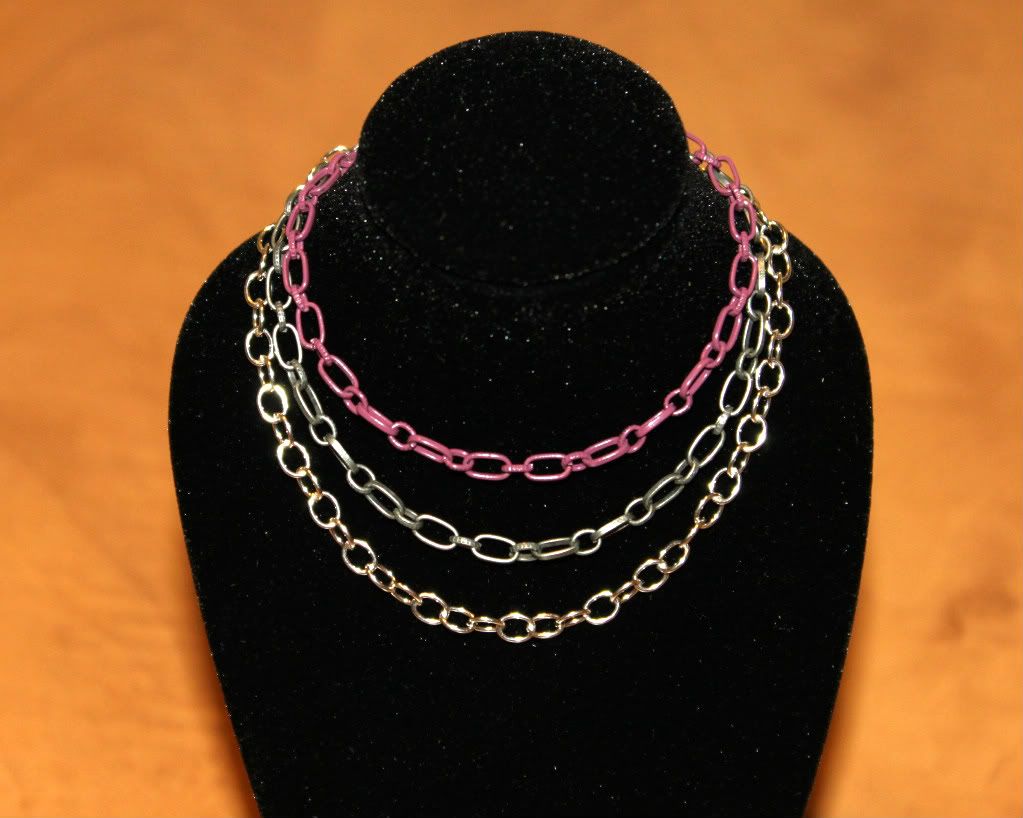
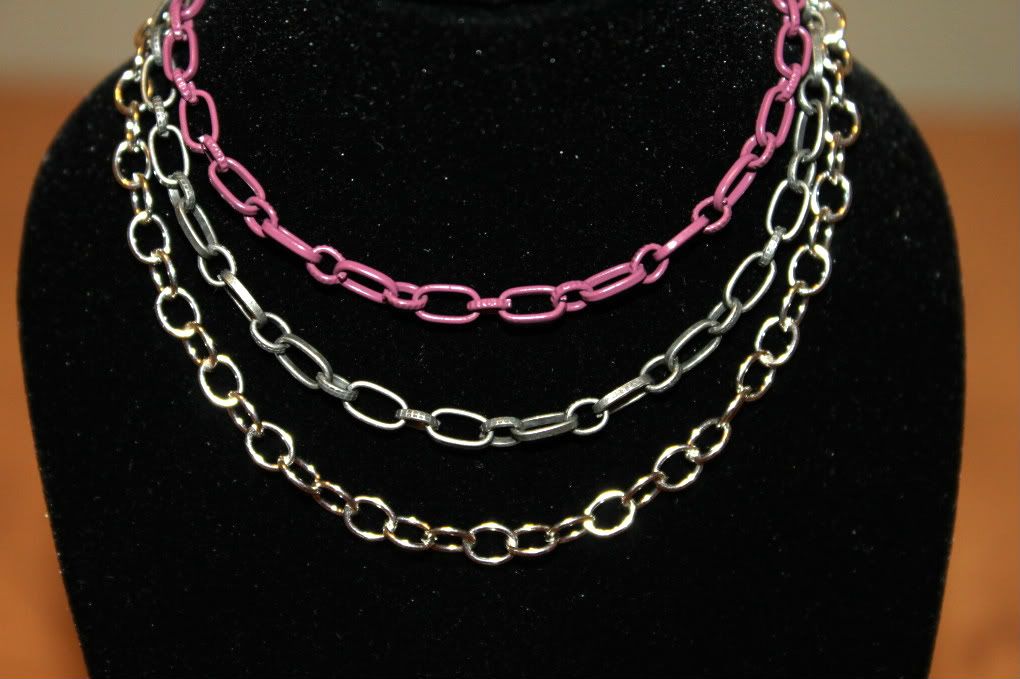
Here are pics of it laid-out flat....
Kaya modeling it for us while wearing Liberty Jane's Salina dress
from the Spring 2011 line....
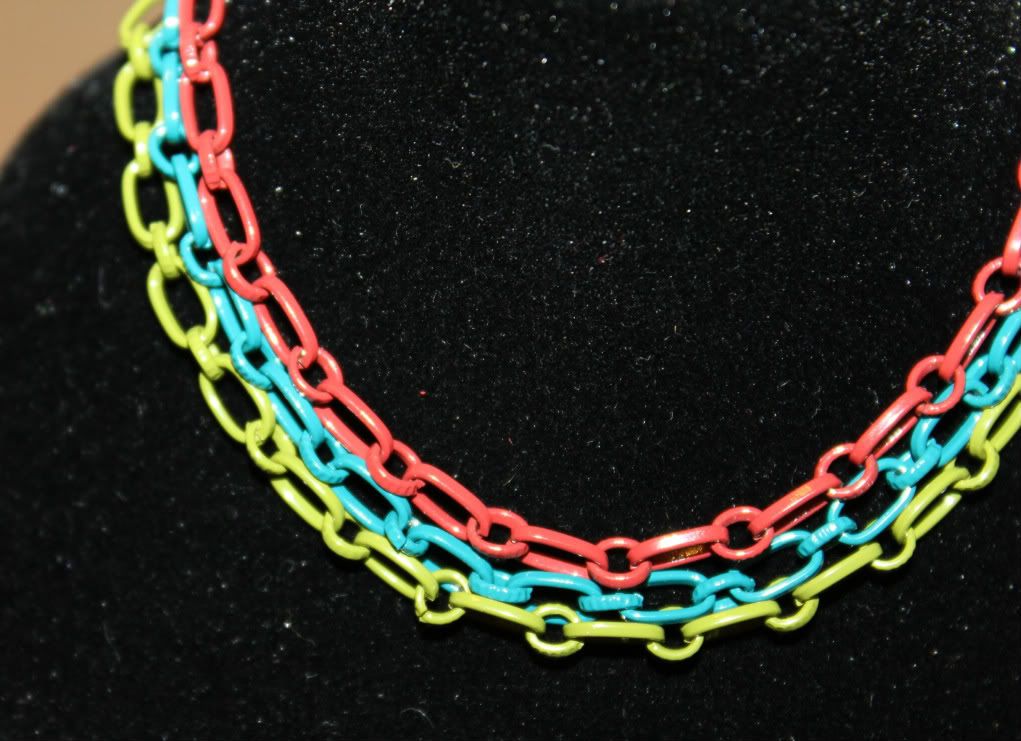
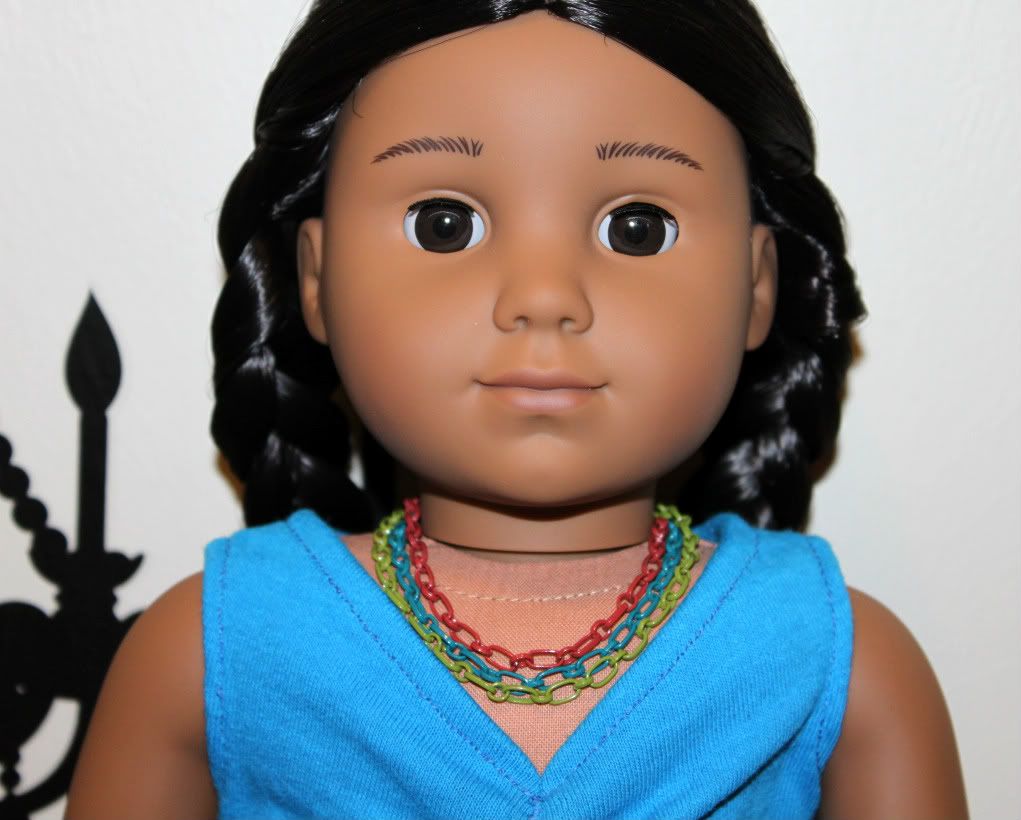
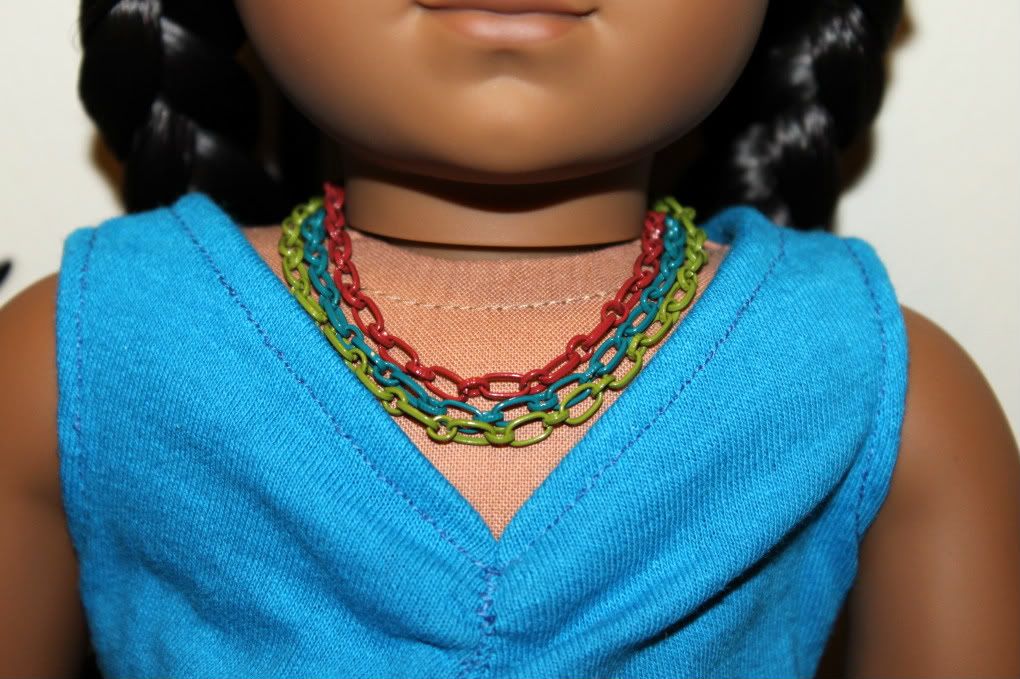
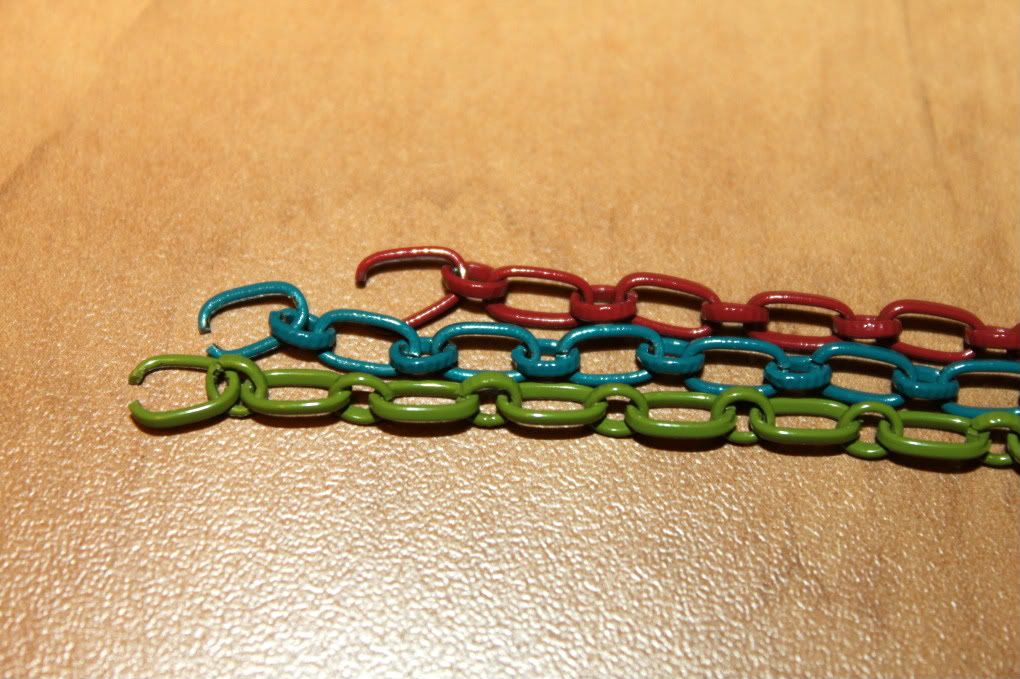
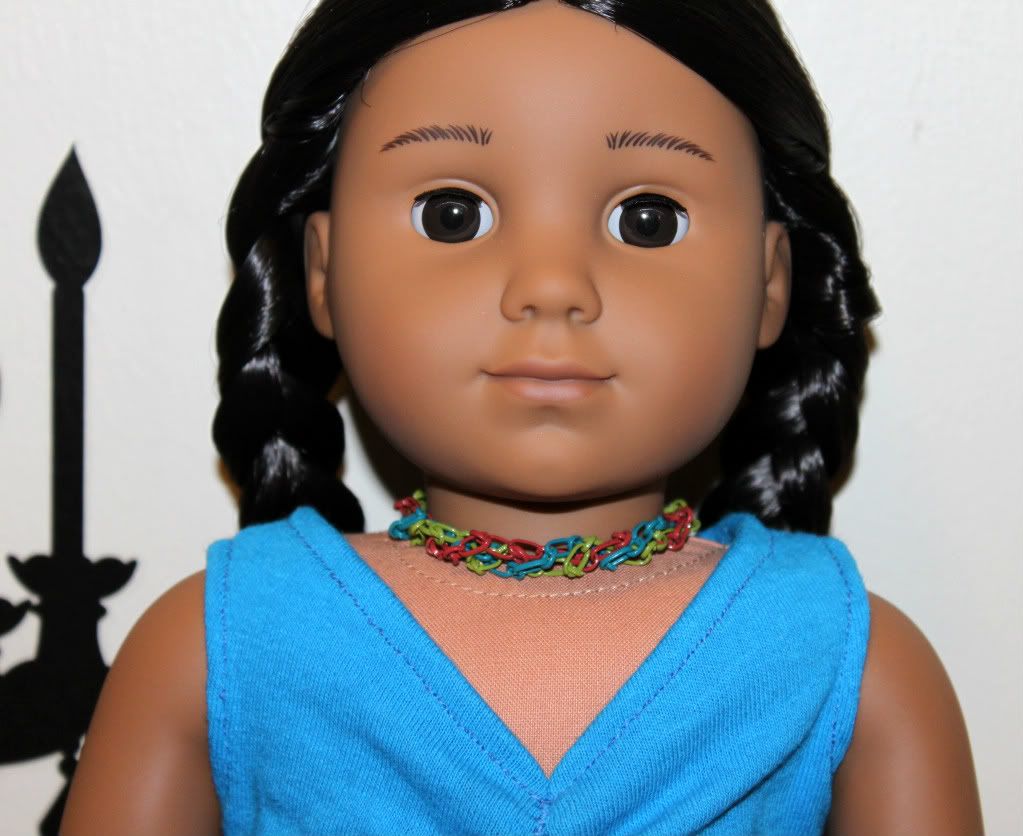
We chose red, blue, and green for second necklace. This time we made each chain just slightly longer than the previous one, so they would be nested, each chain side by side. See the pic below....
Kaya modeled it with a Maiden Flight Clothing ruched blue tank top...
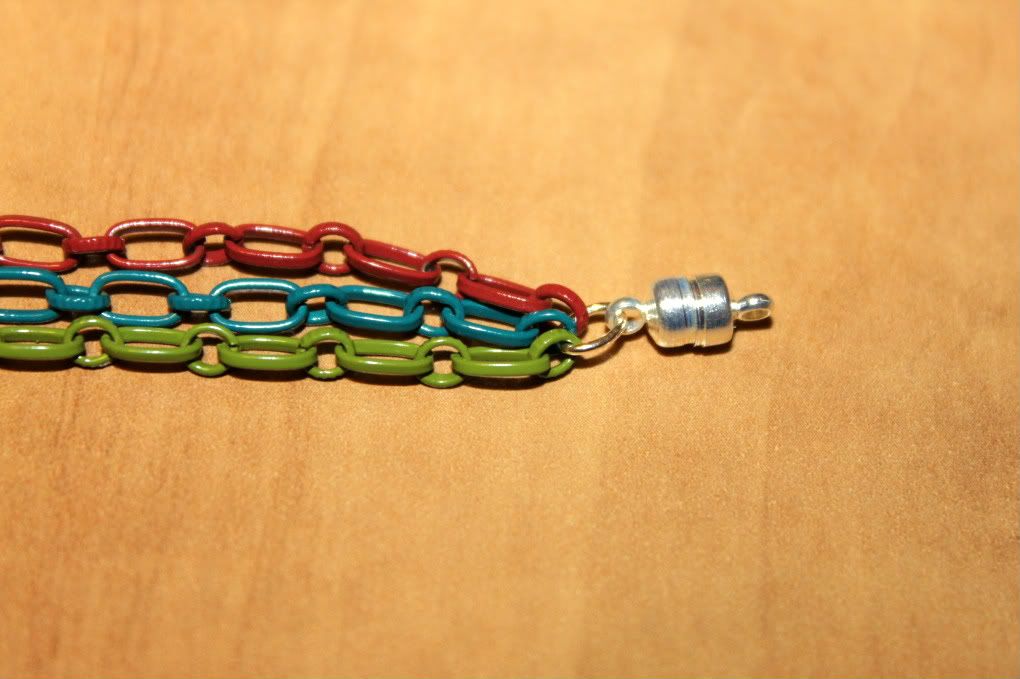
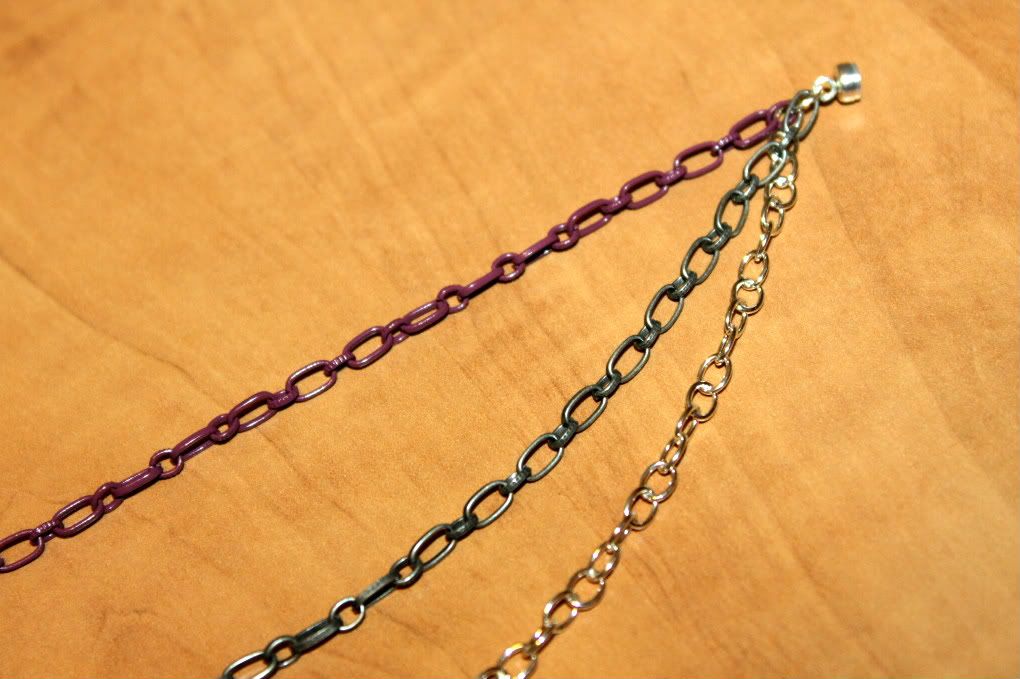
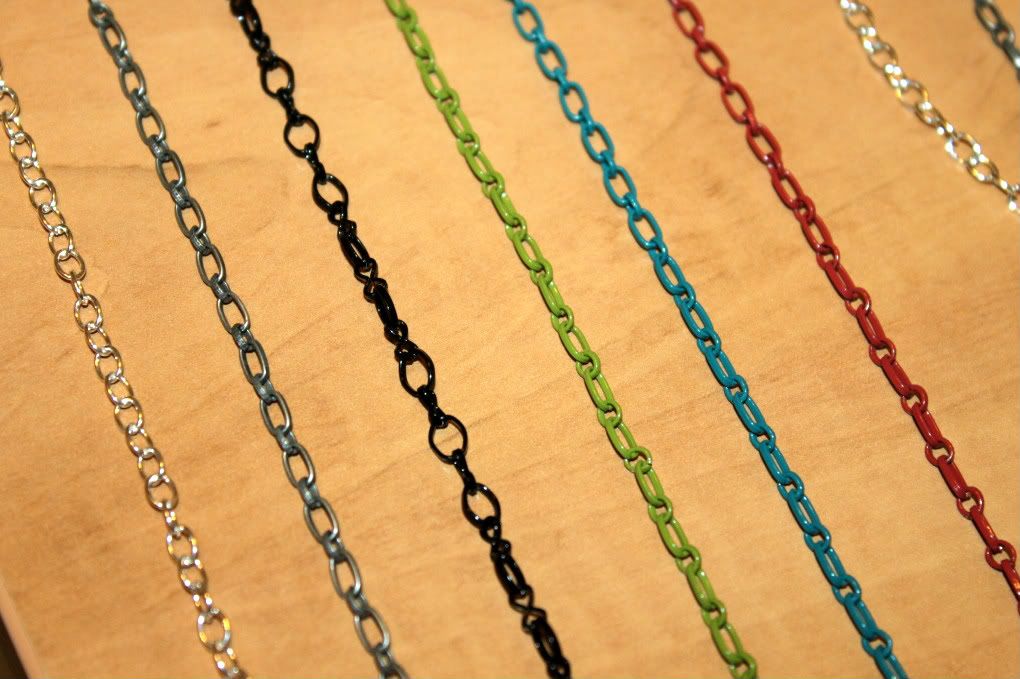
Then you can measure the chains against each other by laying them out on a flat surface. You can add and remove links according to what length you want each chain to be. To create this colored necklace the chains were relatively close in length, one was just a little bit longer than the previous one.
Then we added a silver link to the other side of the magnetic closure and connected the three chains to that, finishing the necklace.
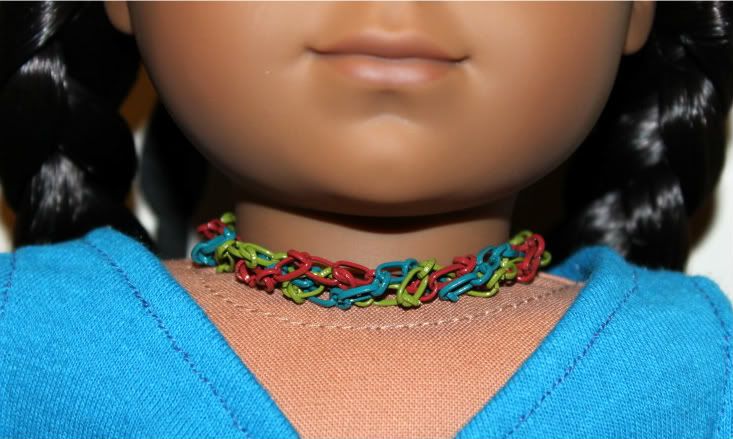
You can also twist this type of necklace to create a multi-color chain choker. All you do is open up the magnetic closure to put it on your doll, twist the necklace until it looks the way you want it to look, and put it on your doll. Kaya models this look for you below...
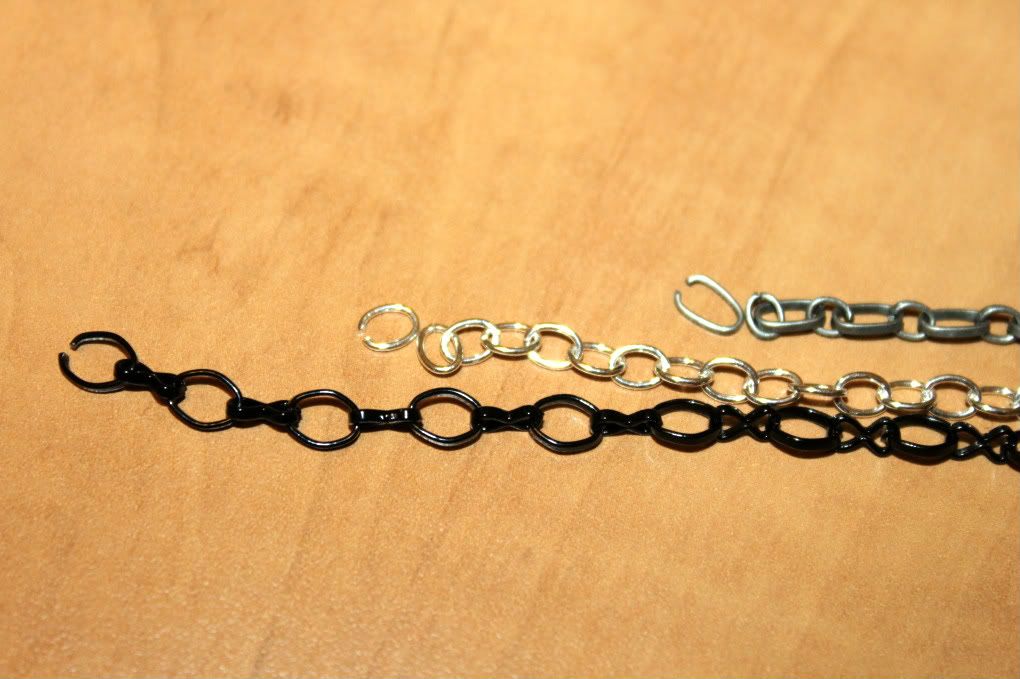
We wanted our third cascade necklace to be longer, so you can see how easy it is to create different looks just by adjusting the lengths of the chains. We used the dark grey, shiny silver, and black chains. Once again we connected the three ends to one silver link connected to the magnetic closure. Then we adjusted the length of the chains by adding on links as we saw fit. You can hold up the necklace to your doll to see if it is how you want it to look as you work.
For this necklace we made each chain about an inch longer than the previous one......
And here are shots of Kaya wearing it with a LJ shirt....
Let us know if you have any questions about how to make these types of necklaces!
Feel free to comment below!
We hope you enjoyed this post-- Stay tuned for more doll jewelry posts. In the future, we will talk about adjusting a couple Forever21 necklaces we bought to fit dolls, and we will show you (most) of our collection of doll jewelry to give y'all ideas for your own projects. :-)
Thanks for visiting The Doll Wardrobe today!
5 comments:
Those are all really beautiful, but I personally really love the colourful one twisted up as a choker. I like how that camouflages the neck space, particularly as some dolls have a bit of a gap there.
I'm curious, if you don't mind letting us know - where did you find the colourful chain? I've never come across that before, and I feel like that's what really makes your pieces special.
The colored chains are in the jewelry-making section of our local Joann's Fabrics (craft supply store). Sometimes you have to hunt for them -- but they should be there. And there were more colors there than what we bought. Hope this helps!
If we can find a link/shop online that sells them -- we'll post it in the comments here. :)
Thanks for reading our post!
Just wanted to say I've been following your Jewelry posts and, working thru several projects thanks to your tutorials. I've made a dozen or so necklaces with the silver chains, charms and love the magnetic barrel closures. I will be picking up colored chains and beaded change tomorrow. Thanks so much.
Glad we could be inspirational!
If you ever want to share your projects with us feel free to send pics to nora.demington@gmail.com!
all i can say is ... kewl!
Post a Comment